Steps:
1) Fix colors in rgb mode. Look at the white patch. It's cold (meaning negative values for "a" and/or "b" using LAB readouts). It should be neutral or warm.
2) Duplicate layer and Apply Image Green channel to top layer. Top Layer goes to Luminosity mode. If you examine the channels, the green channel is the best. Blue channel is a bit noisy. And the image is neutral (just black and white), so use green channel for a luminosity blend.
3) Flatten image and save - cattemp.psd.
4) Go to CMYK mode. CMYK is great for dealing wth blacks. Lots of detail in the black channel. So curve the black channel (lighten it) to bring out more detail. Remember, that in CMYK, the curves are reversed to RGB.
5) Go to LAB mode. Save Image as cattemp2.psd.
6) Duplicate Layer. Change top layer mode to Multiply. Add a mask to the top layer. Apply Image Green Channel from cattemp.psd. (You'll likely to have to open cattemp.psd.) We use the green channel because of the green eyes. We want to green eyes to intensify but stop the blacks from being multiplied.
7) Blur the mask using Gaussian blur. If you are using your original file, use a blur radius of something like 40 pixels. On your jpg image, I used 6-10 pixels, I don't recall.
8) Add a curves layer and adjust the lightness channel to taste. I found the interface between the white and black fur somewhat challenging. So pay attention to that area.
9) Flatten and convert from LAB back to RGB.
10) You're done.
Hint: If you want to improve upon what I have have done, do the following:
11) In RGB mode, place cattemp.psd on the bottom layer. Place your finished file (cattemp2.psd) on the top layer. Using masks and opacity, blur the two together to get your desired result. If I were doing this, I might be inclined to use more of the "original" (cattemp.psd version) white/black fur interface area. I'd leave most of the rest of the image as the final version. But that is something you can play with.
12) Once step 11 is complete, flatten. Then duplicate layer and multiply with a layer mask on top layer. Using the mask, only multiply the bottom right hand side to go to nearly complete black. It's not an area of interest. Instead, make the viewer focus on the face.

 [/url][/IMG]
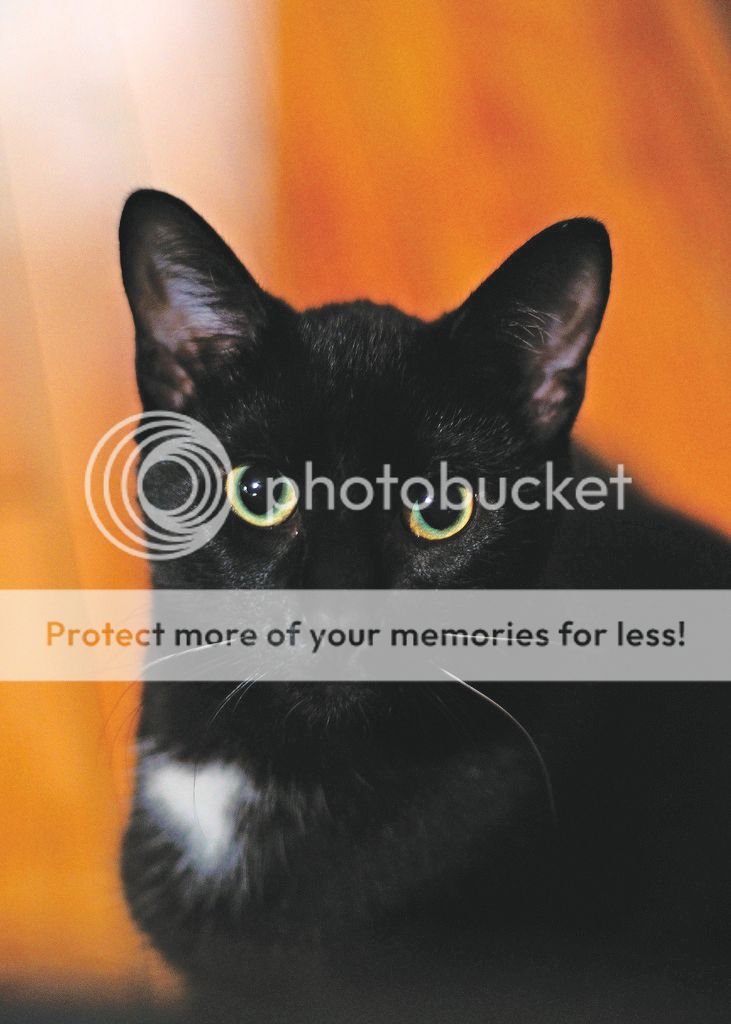
")


